|
|
– Thick plasticard
or Masonite hardboard
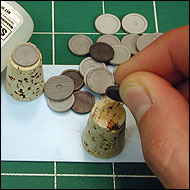
– An assortment of craft corks
– A bunch of small plastic shields
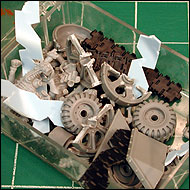
– Miscellaneous cool bitz for
wreckage
– Coarse and fine sand
– White (PVA) glue and super glue
– A large, old brush, and a paper
cup
– Pencil and steel ruler
– Clippers, hobby knife, and cutting
surface
|
|
If you are facing a brigade of tanks and transport
vehicles, then you're gonna need some tank traps.
These handy obstacles can slow down even the mightiest
tank, which can leave them open to a counter strike
by your troops. Set these traps up wisely, and
you can even funnel enemy tanks into designated
fire zones.
Before starting, you'll
need to gather some supplies and tools to build
your tank traps. Don't worry if you are missing
a few things, because you can always try to
improvise with what materials you have on hand.
|
|
|
|
|
First, you'll
need to cut out a 6" rectangular
section from your base material. The
base can be any width, but 2" should
do nicely. Since you can have up to
six tank trap sections in a scenario,
cut out six bases – you might
as well make 'em all right now.
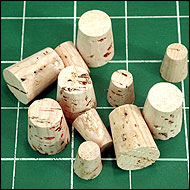
Corks are readily
available from any good craft store
on the cheap. You can get a whole bag
of them either in a variety of sizes
or just one size for about $2 USD. Corks
make good tank traps because they come
pitted and textured right out of the
bag. This feature makes the project
so much easier as half the work is already
done for you.
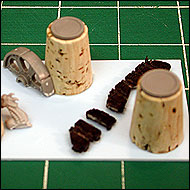
Grab a few corks
and lay them out along a plasticard
base to get an idea about how you want
the base to look. Place a healthy blob
of super glue on the bottom of each
cork and affix them to the base. Simple!
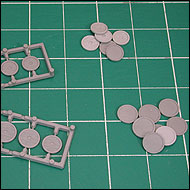
Once all the corks are in place, allow
them to dry. While you wait, get a sprue
or two of round Goblin Shields. Clip
out one shield for each cork you have
on your base.
|
|

|
|
|
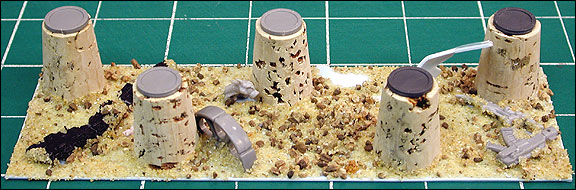
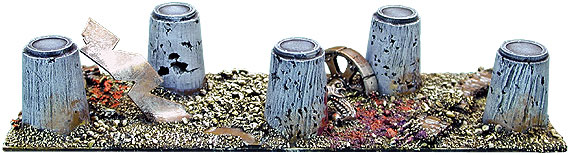
Take these shields
and glue them on top of each cork. Place
them so that the rimmed edges face up.
Also, try your best to center each shield
on the top of the cork. When you are
all done, you'll have a row of easy-made
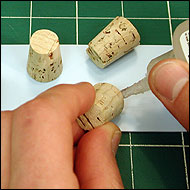
tank traps ready for some paint. However,
if you want a more battle-worn appearance
for your tank traps, use clippers or
a hobby knife to gouge out small chunks
of cork (be careful, though).
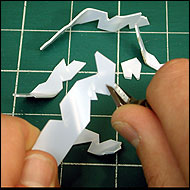
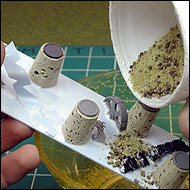
Finish up the
base with some battlefield rubble. Grab
your bitz box and pick out some cool
bitz to spice up your base a little
bit. Glue them all over the place as
you see fit. If you are low on bitz,
then one thing you can do is to create
some wrecked metal strips.
|
|
|
|

|
|