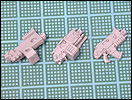
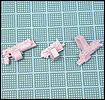
Converted Imperial Weapons
|
Forge Worlds and munitions
plants of the Imperium rarely stray from their precious
STC templates. However, soldiers in the field might
alter their weapon of choice for longer range or increased
firepower to better fight the enemies of Mankind. The
first example, the Veteran's Lasgun, can be explained
as one of these field modifications. The storm bolters
below just present cool ways to make unique weapons
for characters if you have the time and bitz available.
|
|
|
Click the images
below to see larger versions.
|
|
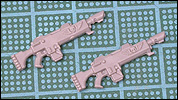
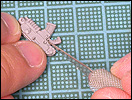
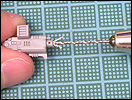
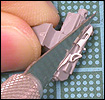
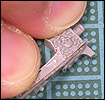
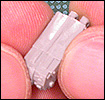
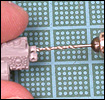
Veteran's Lasgun
|
|
|
|
|
1
|
Use two Imperial
Guard-issue lasguns. |
|
2
|
Cut the
muzzle off of one lasgun where
it joins the gun stock. Repeat
this step on the second lasgun
and save both muzzles. |
|
3
|
Re-attach both muzzles to
the gun stock with plastic glue. |
|
|
|
|
|
|
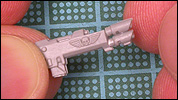
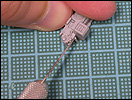
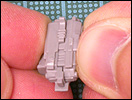
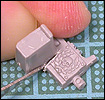
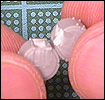
Storm Bolter with
Box Feed
|
|
|
|
|
|
1
|
Use the pintle-mounted
storm bolter from the Land Raider
Accessory Sprue along with your
average Space Marine bolter. |
|
2
|
Cut the
grip off of the Space Marine
bolter. Keep the grip and put
the rest of the bolter in your
bitz box. |
|
3
|
Shave the tab off the bottom
of the right side of the storm
bolter. |
|
4
|
Shave off
the larger tab on the left side
of the storm bolter as well. |
|
|
|
|
|
|
5
|
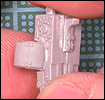
Drill out the
flash suppressors on the sides
of the muzzle on the left side
of the storm bolter with the
No. 1 drill bit. Repeat this
step for the right side of the
storm bolter. |
|
6
|
Drill out
the muzzle of both the right
and left sides of the storm
bolter with the No. 3 drill
bit. |
|
7
|
Glue both halves of the storm
bolter together with plastic
glue. |
|
8
|
Glue on
the grip you cut free from the
bolter before (as with the other
weapons in this article, this
step is entirely optional –
especially if you expect that
the weapon will actually be
held by a model). |
|
|
|
|
|
|
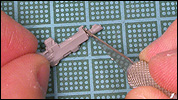
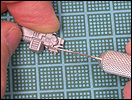
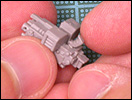
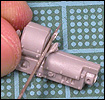
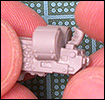
Storm Bolter with
Drum Feed
|
|
|
|
|
|
|
1
|
Use the pintle-mounted
storm bolter from the Imperial
Vehicle Equipment Sprue along
with the Ork Shoota with the
drum feed. |
|
2
|
Shave off
the insides of both storm bolter
halves. Try to make this surface
as smooth as possible for a
solid join later. |
|
3
|
Cut the old ammo feeds from
both halves of the storm bolter. |
|
4
|
Cut down
along the sides of the drum
feed on the Ork Shoota. Then,
chop off the remaining chunk
of Ork gun. |
|
5
|
Carefully cut the sights off
of both storm bolters. Keep
one of the sights and put the
other in your bitz box. |
|
|
|
|
|
|
|
6
|
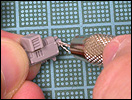
Glue
both smooth halves of the storm
bolter together with plastic
glue. |
|
7
|
Glue both drum feeds together,
with the removal "scars"
facing together (at about 2
o'clock). |
|
8
|
Once the
storm bolter and the feeds dry,
glue the drums into the notch
on the underside of the storm
bolter. |
|
9
|
Glue on the grip you cut free
from the bolter (as with the
other weapons in this article,
this step is entirely optional
– especially if you expect
that the weapon will actually
be held by a model). |
|
10
|
Drill out
the muzzle of both the right
and left sides of the storm
bolter with the No. 3 drill
bit. |
|
|
|
|
|
|


